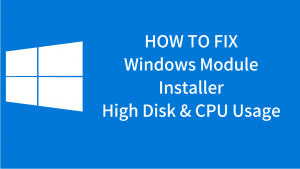
TechsMoon

  • News
  • How To
  • Apps for PC
  • Mobile Apps
  • WordPress
  • Windows
  • Write For Us

How to change Hathway WiFi Password?

July 23, 2021 By Asuna Yuki Leave a Comment | Last Updated July 27, 2021

How-to-change-Hathway-WiFi-Password1

How can you change the Hathway wifi Password?

How to change the Hathway wifi password on the router? Many of the users have the same question like this. Almost all the Internet connections have access that comes with the Password of the credential or without credentials password.

When you buy the internet connection from an Internet connection or service provider, it provides you the DSL Router. Afterward, it is necessary to set the strong Password of the router so no other can have access to it.

To set the password or to change the Password, you must have access to the main control panel of your router. Then you can Log in to the account and change the access control.

Why Password is Important for any router?

Before we go ahead with the discussion of the change password for Hathway, you must know that is it important to have a strong password for the router or not!

One of the main reasons to have a strong password is; to prevent the attacks from hackers. Yes, you may have frequent attacks by hackers from all around the world. If they get succeeded to hack your password, then they can easily access the main control panel and change all the access such as Password any many more things.

Some of the wifi routers have long-range and strong connection speed to it, so surrounding people are trying to access them for their free usage.

If you don’t have a strong password or a password that can be easily hacked then lots of people can connect to it, it may lose the bandwidth of your internet. As a result, you have to face poor internet connectivity.

Many people tend to keep the Password from their name or simply 12345678 that can be easily hacked. So keep your Password with the combination of alphabets, special characters, and numbers. We recommend you set a strong password for your router, and if possible, you should frequently change the Password of it.

Must Read – Download Latest Unacademy App for PC – For all Windows

How to Set the Hathway wifi password?

To set the Password for the first time is quite tricky things for the new users. They have to take the help of any professional guide or any article. To make this process easy, users should understand the whole User interface and all the navigations from the admin panel. Here you can see how you can set the Password of Hathway wifi router.

  1. Connect your computer with the Hathway wifi router using a LAN Wire.
  2. Now, open the router login page in your browser using 192.168.0.1 or 192.168.1.1, Which are the default login IP addresses.
  3. Enter your username and Password provided by the Hathway service provider. Mostly Password is blank so you can access them easily.
  4. Now go to the security and Profile section from the admin panel.
  5. Click on the Set up a Password and set the strong suggested Password.
  6. We recommend you to set a password with the combinations of alphabets, numbers and special letters. So there are less chances to get attacked by the hackers or attackers. Here you are done with the process.

How to change the Hathway wifi password from your computer or mobile?

As we suggested earlier, you should change your Password frequently to prevent from the hackers and attackers. So here, we will share how you can change the Hathway wifi password.

The default login Ip address of all the routers is 192.168.0.1 or 192.168.1.1. It may slightly have changed according to your router model. You have to find your username and Password based on that model.

  1. Make sure to connect your mobile or computer to Hathway wifi. During the entire process, you must be connected with the Hathway wifi.
  2. Now, log in to the admin panel or control panel using username and Password.
  3. After successfully logging in, navigate to the Security and Profile page.
  4. Now click on the Change the Password from all of the options.
  5. Now set your Hathway password with the combinations of letters, numbers, and other special characters. Here you are done!

Conclusion

In the above article, we have shared how you can set or change the Hathway password using the admin panel. If you are facing any trouble or have any doubts regarding this, then kindly mention us through the comment section below. Thank you!


Filed Under: How To, News

[Solved ] The site is experiencing technical difficulties : WordPress Error

July 19, 2021 By Naruto Singh 20 Comments | Last Updated July 27, 2021

The site is experiencing technical difficulties WordPress

How To Solve The site is experiencing technical difficulties WordPress Error

After Latest WordPress Update 5.4.2 or further latest updates, most of the WordPress websites are getting the error message like The site is experiencing technical difficulties. Please check your email for instructions.

If you are Blogger then you might already be aware of the extreme popularity of the WordPress Content Management System. WordPress is one of the best and most used CMS on the Internet, Widely used by Web Designers, Bloggers, and the freelancers.

According to Kinsta, WordPress alone powers 33.6% of all websites on the Internet. Which is almost ⅓ rd of the Whole Internet. Most of the WordPress websites face many technical difficulties which are fixed in the latest WordPress core updates.

One of the best things with WordPress is that it is actively developed and when it comes to support, a lot of people are ready to help you when things go out of control.

Also, WordPress has a huge directory of Plugins and Themes that can extend the functionality of websites with ease. If you are into the world of coding you might be knowing that great releases often come with great Bugs.

The site is experiencing technical difficulties :

As of now, the latest version of WordPress is Ver 5.4.2 which went live on June 10, 2020. Version 5.4.2 is released with several new features. It is mainly focused on troubleshooting errors and fixing configuration issues and fatal errors.

Sadly with the latest update, few WordPress users are facing an error that is restricting users from accessing the login page.

Several WordPress users have witnessed their sites throwing “The site is experiencing technical difficulties” error when trying to login to their websites after updating to WordPress version 5.4.2.


site is experiencing technical difficulties

Every time a new WordPress version release it brings some errors to users. There will be several reasons for these errors and some of the common errors are:

  • Bugs in WordPress release.
  • Incompatibility of plugins with the new WordPress release.
  • Incompatibility of Themes with the new release.
  • PHP version Error.
  • The White screen of death
  • Internal Server Error and many more.

These are some of the commons causes that often become the reason for errors.

Quick troubleshooting will give an idea of why your site encountered the error.

If you are the victim of the error “the site is experiencing technical difficulties” then here are some of the reasons and fixes to solve the error and retrieve the WordPress Dashboard.

Also Read, Add Star Rating Rich Snippets To WordPress Website Without Plugin

Inspecting the Log File:

To know the exact reason for this error you can check your email sent by the WordPress installation. The email may contain data associated with the problem and this error information can help you in fixing the issue quickly.

If there is no mail in your email inbox, check the spam folder as well.

Troubleshooting Guide:

Some users reported that everything was fine after the update but as they played with settings and plugins the error popped out from nowhere.

This is because of the incompatible Plugins and Themes. To quickly solve the issue you need to recollect what you were tweaking before seeing the error.

Chances are that you might be doing one of the Below:

  • Updating or Installing a New WordPress Plugin
  • Updating or Installing a WordPress theme.
  • Error with the PHP version.

If you have changed any of the above then here is how you can solve them.

Before we go in brief of each type of error, You just need to follow five steps before proceeding ahead. So let’s get started!

  1. Check your email for the information of any error.
  2. Check it out that, the error is related to Plugin or Theme. Check both of the conflicts.
  3. Don’t forget to check that you are running on a supported version of PHP.
  4. Now Enable WordPress debug mode and view the error log of the server. You can access this from wp-config.php via FTP and write code before “That’s all, stop editing! Happy publishing.”:

    define( 'WP_DEBUG', true ); When error will be removed, turn this debug mode to “False”

  5. Try to contact your Host provider.

Solving Plugin Related Issues:

rename-plugins-folder-name-cpanel

  • If you believe that the issue is associated with plugins then here is a quick fix you can do to get rid of the error.
  • Make sure you have access to either cPanel or Site Directory through FTP.
  • Now access your site directories either through File Manager in cPanel or through FTP using FileZilla.
  • Now go to the location wp-content/ directory and rename the plugins/ directory to pluginbackup/ now try to load your site. If your site loads then the issue is because of plugins.
  • Now rename it back to the original name and dive into the Plugins directory.
  • Rename every plugin directory by adding “backup” to the existing directory name. Do this one by one and try reloading the site every time you rename a directory.

This way you can identify the plugin that is causing the issue. After finding the plugin simply delete it.

Solving Theme related Issues!

If everything is good with the plugins then the culprit of this error might be your theme.

Every WordPress version comes with default themes Twenty Nineteen and Twenty Eighteen etc. Well, most users never use these themes.

It is suggested to deactivate and remove themes that you don’t use.

To solve the Issue go to Themes directory in wp-content/ folder and inside the themes directory try renaming the folder name by adding the word Backup after the existing name just like how you did above with plugins directory.

Refresh your site every time you rename a theme directory and check if your site is working!

If the error is because of the theme Delete it if you don’t need it. If you are deeply dependent on the theme try solving the issue. Also, get in touch with the theme author if it isn’t you who developed the theme.

Solving Issue with PHP Version:

It is a known fact that most of the Shared Hosting plans of Web Hosting services still use Older PHP Version. But WordPress 5.0 and later recommends PHP Version 7.0 and later which is more secure. in 90% cases, this will solve the issue of The site is experiencing technical difficulties.

 Step1: Login to cPanel

Step2: Go to Select PHP Version

Step3: Choose PHP Version 7.2 or 7.3

Using older PHP versions will leave you vulnerable to security, and incompatibility issues and this could be the reason for affecting your WordPress site.

If you are not aware of Upgrading the PHP version to the latest you can take support from your web host provider.

We suggest you try switching the latest PHP Version 7.2 or 7.3 it can solve your problem.

Other solutions:

Sometimes reverting back to the previous WordPress version might solve the issue for some users.
If the above workarounds haven’t worked for you then try downgrading the WordPress installation to the previous version.

Here is how you can do it:

  • Download the zip folder for the WordPress CMS From the WordPress directory.
  • Now we extract the WordPress zip file to your machine.
  • Now through FTP access your web hosting site directory and delete all the folders and file except wp-config.php and .htaccess.
  • Now upload the other files and folders from your local machine to your webserver directory.
  • This is how you can downgrade your WordPress installation to quickly recover your site.

Conclusion

Hope one of the above workarounds work for you and will help you in recovering your site quickly when it shows ” the site is experiencing technical difficulties” error.

Meanwhile, wait for the WordPress developers to fix the bug and keep updating your WordPress installation to the latest version to check the fix to the above bug. If you face any other difficulties feel free to share your opinion through comments below. We will assist you.

Filed Under: How To, WordPress Tagged With: site is experiencing technical difficulties, technical difficulties, Wordpress 5.2

How to Turn On Bluetooth on Windows 10 – Fix all Problems

July 18, 2021 By Asuna Yuki Leave a Comment | Last Updated July 27, 2021

how-to-turn-on-bluetooth-on-windows-10

How to Turn On Bluetooth on Windows 10?

If you are Windows 10 User and you want to enable the Bluetooth on your computer, but you don’t know how to turn on the Bluetooth on a Windows 10 computer then Stay tuned! Read this article to get the knowledge of it that how to turn on Bluetooth on Windows 10  and If you are not able to turn it on, then how to fix that problem.

Before moving towards turning on the Bluetooth, I hope all of you are aware of this feature, that why we use Bluetooth. So let me tell you in brief about Bluetooth.

Bluetooth is mainly used to connect any Bluetooth devices Such as Headphones, Mouse, etc. And another main Feature is to transfer the files from your mobile to your computer. So for that, you need to turn on the Bluetooth on your Windows 10 computer. So let’s see how to turn on Bluetooth on Windows 10.

Follow the steps to turn on the Bluetooth on Windows 10

Method-1: Using Direct Search Option

Usually, you can turn on Bluetooth quickly on your computer within a few steps. So let’s Go through that,

  1. Click the Start Menu and in Type here to search, search for the Bluetooth option.                                                                                                              type-here-to-search
  2. then you will see one option such as Bluetooth and other devices settings. Now, click on that option.
  3.  Now you can toggle the option of Bluetooth by using your mouse and turn that “ON.”                                                                                                                  on-bluetooth-service-on-windows-10

Method-2: Using Run Command

  1. Press the Windows logo key and select the Setting option. Or else press the Windows logo key + I simultaneously                                                                                    bluetooth-setting
  2. Now, it will open the Settings Window. Then, click on the Devices.              windows-10-device-settings
  3. Afterward, you will see the option of Bluetooth now, click that switch to turn on the Bluetooth.                                                                                                turn-on-bluetooth-on-windows-10

So these were the two methods that show how to turn on the Bluetooth on windows 10, If you are not able to turn on this feature then there is something wrong with the Bluetooth device, so for that, you have to fix this problem in your computer.

If you are facing this same situation, then you don’t need to worry about anything. Here we have the solution to it, And by doing that, you will able to enable the Bluetooth on your computer.

Must Read – [Solved] Windows Modules Installer Worker High CPU and Disk Usage Error In Windows 10

How to Check that Bluetooth service is Enable in Windows 10?

What to do If you find that In your Windows 10 computer you are not able to turn on the Bluetooth! Then how to turn on Bluetooth on Windows 10!

bluetooth-missing-on-windows-10

Here You Can Check that Your Computer supports Bluetooth Service:
On Your PC, You can see the Start Button, then Right-click on that and select the option of Device Manager. From this, you can see how to turn on the Bluetooth on Windows 10.

Device-Manager-on-windows-10


Now, In Device Manager, Check to see Is there any Bluetooth Section or any Bluetooth Adapter that is located in the Network Adapter section.
Now the possible reason is Bluetooth Adapter can also be listed under the section of Other devices Due to some of the errors.

Bluetooth-adapter-on-windows-10

Case-1: Now If you find one or more than one Bluetooth Adapter in Device Manager, then your Windows 10 computer supports the Bluetooth.

Case-2: And If You don’t find any Bluetooth adapter in the Device Manager then, Your Computer doesn’t Support the Bluetooth connection. Well if you can relate this to your Windows 10 computer then don’t Worry! The solution to this problem is Bluetooth Receiver Afterwards You Won’t face any situation like this.

Here, We have many ways to fix this problem, so Let’s see each one by one.

What if you are not Able to Turn On the Bluetooth on Windows 10

Solution-1: Manually Update the Bluetooth Driver in Your Computer

To work Bluetooth correctly, It needs supporting software and supporting hardware. If you are not able to find the Bluetooth service on your computer, then you have to update the Bluetooth driver manually. This can be the answer to your question; How to turn on Bluetooth on Windows 10 PC

To manually update the driver, Go to the website of your Computer Manufacturer’s Website and search for the latest and correct Bluetooth Driver. But before installing the driver choose the right driver for your version either 32 bit or 64 bit.

Solution-2: You can Re-Enable the Bluetooth Driver Software in the Device Manager.

  1. First of all, you have to do; Right Click on the Start button and right-click on the Device Manager.                                                                                      Device-Manager-on-windows-10
  2. Now, Right-click on the Bluetooth Device in the Bluetooth Section and choose the Disable device.                                                                      disable-device
  3. After disabling it, again Right-click on the device and Now click on the Enable Device.                                                                                                            enable-device
  4. Now, Press the Windows logo key + I Simultaneously and open the Settings window.                                                                                                    on-bluetooth-service-on-windows-10

Now, You can see the Bluetooth switch that is appearing on the Window. After doing this still If you are not able to find Bluetooth on your computer then try other steps to resolve it.

Also Read: If You Want to know Release Date of Windows 11 and It’s Features

Solution-3: You can Restart the Bluetooth Service

  1.  Press the Window Logo Key + R Simultaneously, Which will bring the Pop-Up Box.
  2.  Now, Type Service.msc and press Enter.                                                        type-services-msc-into-the-run-box
  3.  From all the services, Find the Bluetooth Support Service and then click on start. If Restart Option is shown to you, then click on that. Most often the option of Restart is grey colored.                                                      start-bluetooth-support-service
  4.  Now, again Right-click on the Bluetooth Support Service and click on the Properties.                                                                                                            bluetooth-support-service-properties
  5.  Here you can set the start-up type to Automatically Then Click on Apply and OK to save it.                                                                                            bluetooth-service-automatic.
  6.  After following all the procedures, Open the Settings Window by pressing the Window Logo Key + I to open the Settings window.
    Now, Make sure that the option of Bluetooth is there.                                            on-bluetooth-service-on-windows-10

Conclusion

Now you can enjoy using your headphones or any other devices that you want to connect with your Windows 10 PC before that confirm that those devices have Bluetooth ON and connect them with your PC by turning on Bluetooth from your computer. I hope this article has helped you to fix them, then Don’t forget to share it with us in the comment section below. Thank you!

Filed Under: How To, Windows Tagged With: bluetooth connection, How to turn on bluetooth on windows 10, windows 10 bluetooth support

[Solved] 3 Best Ways To Solve IRQL_NOT_LESS_OR_EQUAL BSOD Error On Windows 10

July 17, 2021 By Asuna Yuki 3 Comments | Last Updated July 27, 2021

Best-Ways-To-Solve-IRQL_NOT_LESS_OR_EQUAL-BSOD-Error-On-Windows-10

Best Ways To Solve IRQL_NOT_LESS_OR_EQUAL BSOD Error On Windows 10

Some of the users of Windows 10, While playing games or at other situations are getting IRQL_NOT_LESS_OR_EQUAL BSOD Error-Blue Screen of Death Error. Well, this is very tedious Error, and most often this Error occurs due to the incompatible or faulty drivers and some of the hardware malfunctions, Which are mainly programmed to access the address of the hardware.
There are several reasons behind this IRQL_NOT_LESS_OR_EQUAL Error. So Let’s see this.

Reasons Behinds the IRQL_NOT_LESS_OR_EQUAL BSOD Error

There are many reasons behind this IRQL_NOT_LESS_OR_EQUAL BSOD Error, Which is Reported by users or gamers of the Windows 10. You can see this below.

  • IRQL_NOT_LESS_OR_EQUAL Error is BSOD(Blue Screen of Death) Errors in System that occurs mostly when the user of Windows 10 try to update the System into the new version of it.
  • Disk Fragmentation And Faulty Hardware can also generate this IRQL_NOT_LESS_OR_EQUAL BSOD Error in your Windows 10 PC
  • One of the primary reason behind this Error is Incompatible Device Drivers and maybe the poor or Improper Installation of Device Driver.
  • Some of the times Registry Issues or Malware attack or Viruses are playing a useful role to get the IRQL_NOT_LESS_OR_EQUAL BSOD Error.
  • Many Gamers have confirmed that after Overlocking their computer they are getting the same Error and If your device Overheats the CPU then also you can get this Error. To reduce these errors, you have to Disable the overlocking; It may fix the Error.
  • Some of the users have claimed that this IRQL_NOT_LESS_OR_EQUAL BSOD Error has occurred after the installation of the updates of the Windows or even after upgrading RAM.

You might have one Question that what this IRQL_NOT_LESS_OR_EQUAL BSOD Error Causes in your computer then you must know that, this may be resultant into the System Failure or Data Loss or even the serious problem of your System Crash.

To Solve this Problem you can apply any of the methods from this article, And there is no need to try them all because one approach can also work for you and can fix this IRQL_NOT_LESS_OR_EQUAL BSOD Error.

How to Solve the IRQL_NOT_LESS_OR_EQUAL BSOD Error on Windows 10?

So here, We are giving you the Best 3 methods to solve the IRQL_NOT_LESS_OR_EQUAL BSOD Error, So let’s go through those methods.

Before We proceed further,
Make a Note of It: You Must have to log into the Windows, on the problem computer to try any of the solutions. If you aren’t able to do that, then Restart your PC in Safe Mode, Then Afterwards try to apply these methods.
Now If you are not aware of this Safe Mode or How to enter Windows Safe Mode, then follow the below steps:

  1.  Press Windows Logo Key + R simultaneously to open the Run Box.
  2.  Now, Type msconfig and click OK.                                                                      IRQL-NOT-LESS-OR-EQUAL-BSOD-Error-msconfig
  3.  Soon, When System Configuration will open When it opens click on the Boot Tab. Then You can see the option of Safe Boot, Now Tick that option and click OK.                                                                                                IRQL-NOT-LESS-OR-EQUAL-BSOD-Error-msconfig-boot
  4.  Then afterwards, one Prompt Message will open to restart your computer and apply the changes, then click on the Restart. Now you will boot into the safe mode.                                                                                      IRQL-NOT-LESS-OR-EQUAL-BSOD-Error-system-configuration

Note: Now If you want to Start Windows 10 In the Normal Mode then, Make Sure that “Safe Boot” option is unchecked.

Now let’s see the solution to fix the IRQL_NOT_LESS_OR_EQUAL BSOD Error

Solution-1: To solve the IRQL_NOT_LESS_OR_EQUAL BSOD Error, You have to Update the Drivers

This problem also can occur due to corrupted or Missing Drivers. To fix this problem, you have to update the Drivers. You can Update your Drivers Either Automatically or Manually. It’s Up to You, What you choose. Suppose you don’t have time to update it weekly, then you can set the option of “Automatically.” If you can update the Drivers on a daily or weekly basis then choose “Manually.”

  1. In the Search Box of Task Menu, Search for the Device Manager, then click on that.                                                                                                                  device-manager-from-start-menu
  2. Here, you can select the category to see the names of Devices then Right Click on that driver that you want to update.
  3. Now, select the Update Driver and then select Search automatically for updated driver software.                                          update-driver-manager-on-windows10
  4. If Your Windows doesn’t find the new driver then, You can try to search this on the website of your Device Manufacturer and follow their instruction. You can Install or Reinstall it from Microsoft.

Solution-2: To Fix the IRQL_NOT_LESS_OR_EQUAL BSOD Error You have to Uninstall the Problem Drivers

As you know now, Faulty Drivers are the main reasons to get this IRQL_NOT_LESS_OR_EQUAL BSOD Error, To check that Go to the Device Manager and find the faulty drivers from there and uninstall those drivers. But the question is how you will find that the drivers are faulty or not? Then If a driver has a problem, you can see the “Yellow Mark” next to its device. You can see that from below Image.

fix-irql-not-less-or-equal-bsod-error-yellow-mark

Now We are giving you the following steps on how to uninstall the driver.

  1. Press the Windows Logo Key + R simultaneously, Which will open the Run Box.
  2. Type devmgmt.msc In it and click OK. By doing this, the Device Manager window will open.                                                                                              RQL-NOT-LESS-OR-EQUAL-BSOD-Error-devmgmt-msc
  3. Now In the device manager, Locate that faulty driver. As you know Faulty Drivers contain the Yellow mark next to that device. So right-click on that device name and select Uninstall.                                                              RQL-NOT-LESS-OR-EQUAL-BSOD-Error-uninstall-driver
  4. Then one Prompt message will open to confirm the uninstallation, Now tick that checkbox which shows Delete the driver software for this device. Now click the OK button. If you are not able to see that checkbox, then click on the OK to uninstall the driver.                                        IRQL-NOT-LESS-OR-EQUAL-BSOD-Error-uninstall
  5. Now Please Restart your computer and check if the same error exists or not.

Solution-3: To Fix the IRQL_NOT_LESS_OR_EQUAL BSOD Error You can Perform a System Restore.

One more thing you can try that, Do a System Restore. Windows will create one System Point before you install any driver Only if your System Protection is turned On. Afterwards, you can follow the below steps to Restore the driver of the earlier version to fix this Error.

Make a note of It: System Restore means it allows your System to go back to the previous state of it. So some of the content of your Systems like System Program, System registry, System Setting and many more will be changed, but the personal data or files won’t be affected.

  1. Press Window Logo Key + R simultaneously to open the Run Box.
    Now, Type rstrui.exe and click OK.                                                                      IRQL-NOT-LESS-OR-EQUAL-BSOD-Error-run-rstrui
  2. When the System Restore window opens then click on the “Next”, then you may see the screen as shown below. Now select a Restore Point that created before this Error occurred. Now click the “Next” to continue and follow the on-screen instructions given to you, to Finish the System Restore.                                                                                                                                irql_not_less_or_equal-system-restore
  3. Now, reboot your PC and check the IRQL_NOT_LESS_OR_EQUAL BSOD Error is still there or not.

Also Read: How to Turn on Bluetooth on Windows 10!

Conclusion

I hope the above solutions have helped you to solve IRQL_NOT_LESS_OR_EQUAL BSOD Error. If you have any doubts about this Error, safe mode or anything else on this article then, please share that with us without any hesitation. Thank you for reading!

Filed Under: Windows Tagged With: Solve IRQL_NOT_LESS_OR_EQUAL BSOD Error

[Solved] DNS Server is Not Responding or Unavailable Error on Windows 10

July 16, 2021 By Asuna Yuki Leave a Comment | Last Updated July 27, 2021

DNS-Server-is-Not-Responding-or-Unavailable-Error-on-Windows-10.

[Solved] DNS Server is Not Responding or Unavailable Error on Windows 10

Hello friends, well you all know that using the internet you can access any of the sites across the world-wide. But how it correctly works? The answer is DNS- Domain Name System. Domain Name System is a hierarchical naming system that helps us to translate the address of the website into the IP address. Then you can access the site in your browser via the internet.

For Example, If you want to access our website www.techsmoon.com on your browser, then the DNS server translates the address of this site into IP address. Here IP address is nothing but numerical digits. So without the DNS server, you can’t access any of the websites on your browser. But what if you found “DNS server is not responding”! 

While surfing suddenly you are unable to access any sites, and after troubleshooting the network problem on your windows you might get the error that DNS Server is not responding or any of below one;

The DNS Server Is Not Responding.

Your computer appears to be correctly configured, but the device or resource is not responding.

If you have the same error, then don’t worry about it. We are going to share every small information about it. So stay tuned!

How to Fix DNS Server is Not Responding Error?

If you are getting the same error in your windows, then there are several methods or solutions to try it out. Any each of given solution will work it out for you, so you don’t need to try all of these given methods.

Method 1: You need to Correct the DNS Server Address

  1. Press Windows logo key + R simultaneously, which will open the Run Box. 
  2. In Run box, Type Control then Press Enter.                                                                                                                                 Run-Dialog-Box
  3. Now, click on the option of the Network and Sharing Center, which will appear in  Large icons. And click on the Change adapter settings                                                                                                                                          hange-adapter-setting
  4. Now you need to Right-click on the Local Area Connection, Ethernet, or Wi-Fi, which is appropriate to your Windows and click on the Properties.                                                                                                                                ocal-area-connection-properties
  5. Now again click on Internet Protocol Version 4(TCP/IPv4), then click on the Properties.                            IPV4-dns-server
  6. Here you will see the option of Obtain an IP address automatically and Obtain DNS server address automatically. Now tick both the options and press, OK.                                                                                                dns-server
  7. After completion of this process, you will see the option of  Internet Protocol Version 6(TCP/IPv6) click on it and then click on Properties                                                                                                                                        ipv6-dns-server
  8. Now, Same as the above procedure, you will see two options Obtain an IP address automatically and Obtain the DNS server address automatically. Tick both of these options and then click OK.                            dns-server
  9. Here you are done! Now Restart your computer and open your browser to access the website. That’s it!

Also Read- Top 10 Best Android Emulators For PC!

Method 2: You should try to update Network Adapter Driver

  This error also comes in the picture when you have an inappropriate or incorrect network adapter driver. You can update your network adapter driver manually. You can update the driver from Microsoft as well.

  1.  Go to the network adapter manufacturer’s website, and you can download the latest driver from there, then you can copy it onto your USB drive.
  2.  Now go to Device Manager, or you can type Device Manager in search option and open it.                              access-device-manager-from-start-menu-dns-server
  3. Expand the “Network adapters” section, then select your network adapter.
  4. Now right-click on that network adapter and then choose the “Update Driver” option.                                          fix-network-adapter-in-windows10
  5. Now it will ask you to select two options: Search automatically for updated driver software, and to browse your computer for driver software. You can follow any of these.
  6. When you finished installing the new or updated driver, then you need to restart the computer and check if the network connectivity problem is fixed or not. That’s it!

Method 3: You can Reset Your IP And Clear DNS Cache

  1. From the start-Menu Type cmd in the search box and open it. Now right-click on the command prompt and select Run as administrator.                                                                                                                                          Run-Command-Prompt-As-an-Administrator
  2. Now it will ask if you allow the Command Prompt to make changes to your computer then click “Yes.”
  3. Now, Type the following commands and press the Enter after each command.
     ipconfig /flushdns 
    
     ipconfig /registerdns 
    
     ipconfig /release 
    
     ipconfig /renew 
    

    cmd-dns-server

  4. Now Restart your computer and check the website you want to search and access the internet and see the error is fixed or not.

Method 4: You can Restart Your Router and Modem

If the DNS server is not responding correctly, then restarting your router and modem may help you to fix this problem.

  1.  If there is an “On/Off” button on your router, then press it to turn off your router.                                                          restart-router
  2. Now wait for the while and Turn it ON again.
  3. Now back check the website you want to search and access the internet and see the error is fixed or not.

Conclusion

In this article, we have described all the possible ways to solve the “DNS Server is not Responding” error. If you have the same error, then try to solve it using the above methods. We hope it could help you to solve the error. If you have any other doubts or suggestions regarding this, then please let us know in the comment section below. Thanks for reading!


Filed Under: Windows Tagged With: Dns Server, DNS Server is Not Responding

  • « Previous Page
  • 1
  • 2
  • 3
  • 4
  • …
  • 22
  • Next Page »

What’s New

  • [Solved] Windows Modules Installer Worker High CPU and Disk Usage Error In Windows 10
  • Solve APC Index Mismatch In Windows
  • Windows 11 Release Date of 2021, Features, Concepts And Latest News You Need to Know
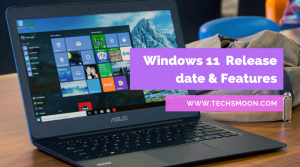
  • Add Star Rating Rich Snippets To WordPress Website Without Plugin
  • Download Latest Unacademy App for PC – For Windows 10/8/8.1/7
  • How to change Hathway WiFi Password?
  • [Solved ] The site is experiencing technical difficulties : WordPress Error
  • How to Turn On Bluetooth on Windows 10 – Fix all Problems
  • [Solved] 3 Best Ways To Solve IRQL_NOT_LESS_OR_EQUAL BSOD Error On Windows 10
  • [Solved] DNS Server is Not Responding or Unavailable Error on Windows 10

Handcrafted with
© Copyright 2019-2020 TechsMoon
Privacy Policy | Contact Us | Disclaimer | Sitemap

  • News
  • How To
  • Apps for PC
  • Mobile Apps
  • WordPress
  • Windows
  • Write For Us